This post contains affiliate links. If you make a purchase using one of my links, I will receive a small percent of the sale at no additional cost to you.

The cabin kitchen has been many years in the making – from laying the flooring in early 2020 to finally beginning demo in October of 2023. In between, we tried different layouts, different finishes, and even thought at one point maybe we’d go with painted cabinets. In the end, we’ve achieved a warm, open space that not only feels like part of the cabin but is specific to it – a big upgrade from the original builder-grade kitchen.
The benefit of taking our sweet time in the planning phase is that we really lived with the kitchen and picked at every problem we wanted to solve. We prioritized creating a kitchen that supports how we spend our time at the cabin: recuperating on weekends and occasionally hosting friends and family. When we’re here, coffee and cocktails are essential, cleaning up after big meals needs to be easy, and we need to feel at peace.
The open floor plan demands quiet (visual and auditory) so storage for our particular collection of kitchen stuff was a must.
Before, despite all the cabinets, our countertops were cluttered. Now, everything has a home and what’s on display is meant to be. Read the original kitchen plan post for full befores, the plans, the pain points and how we sought to fix them.
Throughout this post, I’ll tell you what we changed and how it’s helped us reach our goal of a kitchen we love to be in.
The Kitchen: Before and After
There’s little in life more satisfying than a before-and-after, so I’m not going to make you wait. The amount of STUFF out in the befores is comical but very honest. The afters are styled and pared down a bit from real life (the dish drying rack and the toaster oven sat this one out) but I promise, we keep this kitchen remarkably tidy because now it’s actually easy to do.
Kitchen Window Wall | Before

Kitchen Window Wall | After

No More Upper Cabinets
We eliminated upper cabinets from our kitchen because I’m short and I hate asking for help (I’m working on the latter with my therapist). I have heard of step stools but also, who wants to climb a mini ladder every time they need a plate? Visually, the uppers blocked light and, due to their size, didn’t really hold that much. Now our plates, water glasses, bowls, spices, and more are stored in the island drawers where I can reach them easily with no assistance. Removing upper cabinets is certainly not for everyone, but it works for us.
Bigger Window, Bigger Sink
My husband, Andy, doesn’t ask for much but he did ask for the biggest sink we could fit. We adjusted the lower cabinet run on this side of the kitchen by adding a larger window to accommodate a wider corner cabinet and a 32” single bowl sink. A motorized roman shade provides privacy at night.
Kitchen Range Wall | Before

Kitchen Range Wall | After

Kitchen View From Above | Before
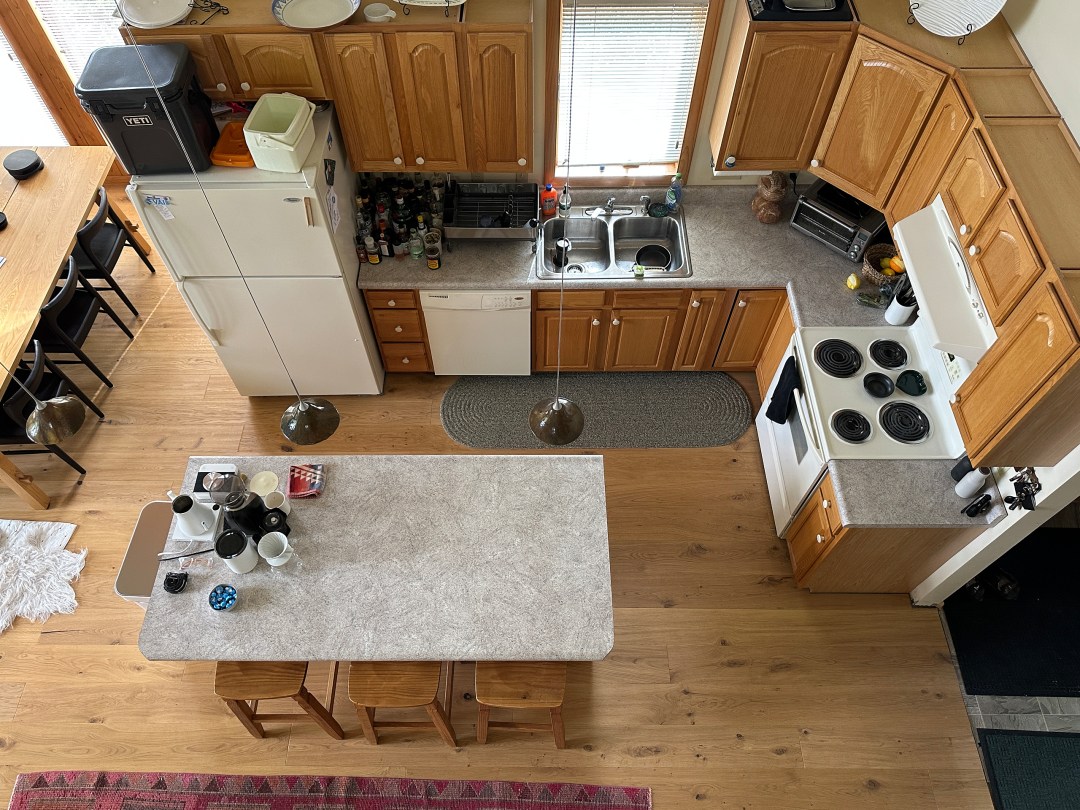
Kitchen View From Above | After

My favorite thing about this view is that you no longer look down from the loft and see the unfinished tops of cabinets. No more display platters. No more coolers on top of the fridge. My second favorite thing is the larger island, free of coffee-making-clutter. The island still seats 3 people, but now they have some personal space.
Kitchen Coffee and Booze Bar | Before

Kitchen Coffee and Booze Bar | After

New cabinets and a countertop on the formerly unused wall solved nearly all of our clutter problems. We added inches onto the island for a pull-out trash option so our garbage can is no longer a focal point. An extra oak stool lives next to the coffee bar for guests who like to chat Andy up while he makes drinks and it’s easily moved to the end of the island as a fourth seat.
The Kitchen Renovation

I won’t go step by step into the renovation of the kitchen in this post (you can find a lot of that work in my IG story Cabin Kitchen highlights) but here’s a peek at the kitchen guts. We did most of the work ourselves but hired out the electrical and drywall work, including having the entire main floor’s ceilings sanded smooth to remove the stipple texture. I’ll never forget the dust and I’ll never stop finding it.
Cabinets

IKEA Cabinet Boxes
Our cabinet boxes and drawers are IKEA SEKTION. In nearly every kitchen budget, there are places where you splurge and where you save – we opted to shift more of our budget toward finishes rather than the cabinet insides. IKEA cabinets have been around a long time and there’s a wealth of content available on the internet from how to assemble them to how to hack them to custom sizes, and plenty of reviews on how happy people are with them over time. It’s easy to plan your own kitchen with the IKEA Kitchen Planner and now you can order all of your cabinets online without having to go to a store. The cabinets come flat packed, which made them easy for us to transport to the cabin for assembly.
I’ll dedicate a whole post to how we feel about our IKEA kitchen cabinets, how we made them work for us, and our favorite resources, but for now the TL;DR is: we’re delighted with the amount of storage we have, the price can’t be beat, we love the soft close drawers and doors, but they’re MDF so they’ll never feel quite like solid wood cabinetry.
Choosing Cabinet Fronts
The best trick for making an IKEA kitchen not look like an IKEA kitchen is sourcing your drawer fronts, doors, and panels elsewhere. There are a lot of companies out there specializing in fronts made just for IKEA cabinets which makes this easier than ever, but finding real wood or real wood veneer options is the tricky part. You’ll find a lot of vinyl or foil wrapped wood-look choices out there, but if your budget allows, there’s really nothing better than the look of real wood grain on your cabinets.
Plykea
Note: I partnered with Plykea for a PR discount.
My search led me to Plykea. They’ve been making doors around since 2016 and are available in both the US and the UK.
Plykea’s signature is their FSC-certified birch plywood core, paired with either a real wood veneer (wood faced ply), Formica, or Fenix. We chose their white oak wood faced ply which is finished with hard wax oil, meaning I can refresh the finish easily whenever needed. I was originally a little nervous about the plywood core looking too modern, too DIY, or becoming too much of a statement in the kitchen, but as soon as I saw it in person I knew it was perfect. The stripe and the grain are an excellent pairing, and having visual texture on the end panels takes the whole thing up a notch. It’s details like this that take a kitchen from looking stock, and very IKEA, to looking spendy and custom.

Integrated Cabinet Handles
Plykea offers a few recessed and integrated handle options, we chose the J-Profle for a clean visual line across our cabinet runs.
The pros of integrated handles:
- Clean lines
- If you’re working with a smaller kitchen or one with narrower walkways, every inch you can save counts, both physically and visually
- No cabinet hardware means no hardware to buy and no extra time to install it
- If you’ve felt the rage that comes from catching your shirt, pants pocket, or belt loop on a kitchen cabinet drawer pull or knob , imagine a life where that just will never happen again

Customizations: Wood Grain Direction + Custom Pieces
Plykea lets you specify the grain direction for your cabinets with some reasonable caveats. We chose horizontal for all door and drawer fronts, and vertical for all end panels. Plykea can’t guarantee a grain match over a super long span of cabinets like for our coffee bar, but they did an exceptional job picking a grain that made sense and didn’t disrupt the flow, as seen on the last cabinet above.
We were also able to customize the height of our toe kicks as we needed 5” plinths instead of the standard 4 ½”. My dad used a router bit to cut vent holes in the toe kick along the coffee bar for our air returns. The plywood core and veneer held up beautifully and if I do say so myself, this is a much more elegant solution than adding a metal vent grate.
Countertops + Tile

[hand wash | cowboy painting | statement sconce | tile | induction range]
Heath Ceramics Tile
When I design a room, I search for an anchor element that will make every other decision easy. It took me a while to figure out the direction for the backsplash, I looked at off white tile, green tile, even mauve-y tiles, but when I held a sample of Heath Ceramics Redwood tile in my hand, everything clicked in my brain. Heath Ceramics has been around since 1948 and is truly timeless. The variation in the brick-toned tile is stunning and ticks the box on adding warmth with a nod to mid century brick.
For the main kitchen’s backsplash tile design, I landed on a single row of vertical 2×9”. I originally planned to add a line of oak trim along the top of the tile but decided against it because I didn’t want to add a flammable surface so close to the range top and couldn’t find an elegant solution to get around that. Instead, I worked with a Heath Tile specialist to order standard tile with special glazed edges everywhere the tile would otherwise have an exposed edge. I paired the tile with Mapei’s Chocolate sanded grout, which is a close match to the tile’s brown clay base.
We worked with an electrician to raise the outlets and switches to land on the wall above the tile so we wouldn’t have to place receptacles over the tile. If you start looking closely at all the beautiful kitchens on the internet and magazines, you’ll see they’ve photoshopped the outlets out of view. I left ours in so you can see how unobtrusive they are, by design.
Soapstone Countertops
I considered quartz for the countertops but the call of natural materials won out. The look, feel, and durability of soapstone makes it unique in the space, and it’s honestly the first thing people comment on when they see the kitchen. “You can’t tell how nice this is from your stories” – more than one person while touching the island.
We went months without oiling the countertops to see how we liked them unsealed. While, we loved the soft gray look but noticed that every oil spot showed easily, making the kitchen look less clean more often. In the end, we decided to wax the countertops with Howard’s Wax it All – it’s what Shavonda uses on her soapstone and I trust her in all things.
Range Hood

Our custom range hood surround is one of my favorite elements of the kitchen. It brings the eye up and makes the kitchen feel built-in and intentional. It creates a moment and it echoes the lines of the fireplace in the living room opposite the kitchen. We built the framing out of wood and had the drywaller finish it in drywall.
Two big challenges of an open floor plan kitchen are noise and cooking smells that go everywhere without proper ventilation. The original kitchen had a recirculating vent hood which was largely useless and mostly just noisy. We chose a powerful 700 CFM range hood insert with a remote blower to aggressively tackle cooking smells and best reduce fan noise. I first heard of installing a range hood with a remote blower from Ashley at The Gold Hive and knew we absolutely had to borrow her idea. Installing a blower separate from the hood itself means that you can keep most of the fan noise out of your face. We installed ours in an unused bathroom closet in the loft, it’s behind 2 closed doors and pushes the vented air outside.
Appliances

Fisher & Paykel Induction Range
We love cooking with gas in our Pittsburgh home but without easy gas line access at the cabin, we chose to go electric. We considered regular electric but after demoing induction cooktops at a local showroom, we were really impressed with the control and energy efficiency of induction. And, if nothing else, heating your food with magnets feels like a really cool magic trick. “It’s magnets!” – me to every unimpressed guest.
Choosing a statement range hood pretty much means you’ve gotta pick a nice looking range to go under it. These days consumer ranges look a little like aerodynamic cars with lots of doo-dads, bright screens, and smartphone features but what I wanted was something simple. I tried to talk myself out of the Fisher & Paykel induction range for at least two months after I saw one ($$$), but I knew it was the only range I could see in our kitchen. Just look at all those knobs and that tiny, demure clock.
I’m not much of a chef (Andy does all the cooking) but I’ll tell you, it boils water for my vegan mac and cheese SO FAST.

Bosch Refrigerator
We did not have the budget to go with a paneled fridge so I was extremely picky about finding a counter depth fridge with clean lines. We went with a boxy Bosch fridge with handles that closely match the oven door on our range. Custom panels from Plykea wrap the outer edges of the fridge for a more integrated look. The french doors mean more walkway space and the freezer drawer works really well for us and makes nice ice.
Light pollution from appliances is a pet peeve of mine, so we were very intentional in choosing a fridge with no screens or in-door dispensers. The fridge has wifi and an app, if that’s your thing, but I can’t find a single reason to know anything about my fridge from my phone.
Bosch Dishwasher
We went with a Bosch dishwasher in the same line as the fridge and opted for a pocket handle to stay consistent with the integrated handles on our cabinet doors and drawers. The kitchen’s original dishwasher was so loud it was hard to hear the TV over it so a quiet dishwasher was a must. This one runs at 42 dB(a) and has just one little light on the door to show it’s running or has completed a cycle. Peace and quiet. It too has an app and we do actually use it to run the dishwasher after we’ve left. We named the dishwasher Suds.
Lighting

[white articulating sconces | island pendant | statement sconce | counter stools]
A good lighting plan is essential for a well-functioning kitchen. Like most things in design, it’s about layers. It’s all about the mix of task, ambient, and accent lighting allowing you to choose the right combination for what you’re doing in the space.
Task Lighting
Above the sink wall, we added three task lights with the center light above the sink switched separately. They cast light that hits the middle of the countertop (not in your eyes) right where you need it for washing dishes or prepping food. We chose a white finish for the fixtures to let them better blend into the sloped ceiling and to echo the white bases of the counter stools at the island.
We lit the island with a linear pendant hanging from the high sloped ceiling above. Rather than go with multiple fixtures, we opted for one to evenly light the island workspace and reduce visual clutter. The light hangs from two thin metal cables with power running up one side. The shape of the shade is inspired by the cabin’s a-frame roof.
Ambient Lighting
Our Blueprint Lighting sconce works as a statement piece, filling the corner with ambient light. It adds a soft glow to the kitchen at night, filling a formerly abysmally dark corner.

[recessed accent lights + housing | wall hangings (custom)]
Accent Lighting
We replaced the existing large recessed walkway lighting with accent lighting that spotlights our shelves and lights the front edge of the countertop. A small, dimmable lamp from Schoolhouse fills the work surface with light in the evenings for cocktail making.
Bar + Coffee + Shelving

[stemware racks | lamp | coffee grinder | kettle | shelves | mugs| redwood serving bowl | handled bowls (similar) | stacked bowls]
IKEA 15” Cabinets
Our bar and coffee supplies were the biggest culprit in the kitchen’s clutter and one of the biggest problems to solve. Adding cabinets along the unused wall behind the island was one of the smartest choices we made. To preserve the walkway, we chose cabinets with a shallow 15 inch depth rather than the standard 24 cabinet depth. The tall cabinet and the cabinet to its right serve as our food and baking pantry, the middle cabinet holds bottles, and the last cabinet houses bar and coffee tools.
Floating Shelves
We added custom oak floating shelves to display our serving pieces, vases, and keep our most used coffee and bar drinkware close at hand. Unlacquered brass stemware holders under the bottom shelf protect our delicate glasses from wear along the drinking edge and free from collecting dust inside. Heath Ceramics Redwood tile is stacked from the soapstone counter to the bottom of the first shelf. We installed matte black switches and switch plates to make the new outlets less noticeable against the deep red of the tile. In my original plan, we were going to install the tile on this wall all the way to the ceiling, but decided it would feel too visually heavy opposite the single row of tile used in the rest of the kitchen.

Kitchen Sources
Paint: Walls and ceiling are Benjamin Moore Simply White
Flooring: Stuga in Shell
Countertops + Tile: backsplash tile | grout | soapstone countertops
Cabinets + Shelving: IKEA cabinet boxes | doors, drawer fronts, panels | floating shelves
Appliances + fixtures: refrigerator | dishwasher | induction range | range hood insert + remote blower | sink | air switch | faucet
Lighting: island pendant | statement sconce | articulating arm sconces | rospo lamp | recessed accent lights + housing
Furniture + Accessories: kitchen island stools | single oak stool | rug runner | mugs | kettle | non-slip willow tray | oil cruet | salt + pepper mills | remote controlled roman shade | cowboy painting | brass frames
Thank you for following along on the many many months of renovations and for being as invested in this kitchen as we are!


4 Comments
Good lord, Emily, this is all perfect! Such impressive planning and execution. It couldn’t be more beautiful. Thank you for sharing!
Thank you so much, Marti! All I wanna do is plan kitchens now.
Nice ice – what more could you ask for.
I admire your design sense and your thoughtful planning. Thanks for sharing. It’s gorgeous!
Longtime reader, first-time commenter here, but just couldn’t help popping in to say that you absolutely nailed this. Each and every detail is perfection in my book. I can’t get over the range! The tile! The hood vent! The counters! The lighting! I keep coming back to this post to stare again at the pictures. Bookmarking, underlining, triple-circling everything here for our own kitchen reno!